






What Should You Do After a Failed Chemical Anchor Pull-Out Test? Malaysia

What Should You Do After a Failed Chemical Anchor Pull-Out Test? Malaysia
Failed Chemical Anchor Pull-Out Test – Next Steps Malaysia
A failed chemical anchor pull-out test should not be treated as the end of the process.
The correct response is not simply:
“Replace the anchor and test again.”
A failed result should first be documented, investigated and reviewed according to the project’s approved QA/QC procedure.
The purpose is to determine whether the failure is:
Isolated
Installation-related
Material-related
Substrate-related
Test-setup-related
More widespread across the project
For contractors, QA/QC teams and testing companies in Malaysia, a structured response helps avoid repeated failures and unclear reporting.
Step 1 – Stop and Make the Test Area Safe
After an abnormal or failed result, stop applying load.
Ensure:
Hydraulic pressure is controlled
Equipment is stable
Personnel remain clear of the test setup
Any damaged components are handled safely
Do not immediately continue loading without understanding what happened.
Step 2 – Record the Maximum Applied Load
Write down the actual result.
For example:
Required Test Load: 80kN
Maximum Achieved Load: 56.8kN
Do not rely on memory.
If the tester stores measurement records, make sure the reading can be linked to the correct anchor.
Step 3 – Record the Anchor ID
Every failed result should be traceable.
Record:
Floor
Grid
Zone
Elevation
Anchor number
Bracket number where applicable
A failed result without a clear location is difficult to investigate later.
Step 4 – Photograph the Failure
Take photographs before disturbing the test area.
Useful images include:
Overall location
Anchor before removal
Test setup
Tester reading
Concrete condition
Failed anchor
Any visible damage
Photographs can provide evidence that the force number alone cannot.
Step 5 – Record the Failure Behaviour
Do not write only:
“FAIL.”
Record what actually happened.
Possible observations include:
Anchor pulled out
Threaded rod slipped
Concrete cracked
Concrete breakout occurred
Bond failure observed
Steel component failed
Adapter slipped
Tester setup moved
Failure mode is important for investigation.
Step 6 – Check Whether the Test Setup Was Correct
Before blaming the anchor installation, review the test arrangement.
Check:
Correct adapter
Sufficient thread engagement
Pulling alignment
Reaction setup
Hydraulic equipment
Tester zero condition
Required load
Test procedure
A poor test setup can produce misleading results.
Step 7 – Confirm the Correct Test Load
Verify the latest approved project requirement.
Possible sources include:
Structural engineer
Façade engineer
Consultant
Approved method statement
Project specification
Approved anchor design
Do not assume the target load used during the test was automatically correct.
Step 8 – Review the Chemical Anchor Installation
If the test setup was correct, review the installation.
Important information can include:
Anchor product
Threaded rod size
Drill diameter
Hole depth
Hole cleaning
Embedment
Adhesive installation
Installation time
Curing conditions
Installer
This can help identify likely causes.
Step 9 – Check Curing Time
One of the first questions should be:
Was the chemical anchor fully cured according to the approved system requirements?
Check:
Installation date
Installation time
Base-material temperature
Product curing requirements
Testing too early can lead to poor results.
Step 10 – Check Hole Cleaning Records
Where the chemical anchor system requires a specific cleaning procedure, confirm that it was followed.
Potential issues include:
Insufficient blowing
Insufficient brushing
Wrong brush size
Dust remaining in the hole
Contamination
Poor preparation can affect bond performance.
Step 11 – Check Embedment Depth
Confirm that the actual embedment matches the approved installation.
Possible problems include:
Hole too shallow
Rod inserted insufficiently
Obstruction inside the hole
Incorrect anchor length
Embedment should be verified as part of the investigation.
Step 12 – Check Chemical Anchor Product and Batch
Review:
Product name
Batch number where available
Expiry date
Cartridge condition
Storage information
Do not automatically assume material failure, but material information should still be documented.
Step 13 – Check the Concrete
The surrounding concrete may be part of the failure.
Inspect for:
Cracking
Honeycombing
Weak areas
Repairs
Deterioration
Edge condition
Previous drilling
Sometimes the substrate, rather than the adhesive itself, controls the observed failure.
Step 14 – Inform the Responsible Project Team
A failed result should normally be reported according to the project’s QA/QC communication process.
This may involve:
Main contractor
QA/QC engineer
Consultant
Structural engineer
Façade consultant
Anchor supplier
Do not make major corrective decisions independently unless authorised.
Step 15 – Follow the Approved Failure Procedure
The project may define what happens after failure.
Possible actions can include:
Additional testing
Investigation
Replacement
Reinstallation
Engineering review
Revised test sampling
The actual response should follow the approved procedure.
Should You Immediately Retest the Same Anchor?
Not automatically.
If the first test has already changed the anchor or surrounding concrete, a second test may not represent the original condition.
Before retesting, establish:
Was the anchor damaged?
Was the test setup incorrect?
Is retesting allowed?
What does the engineer require?
Should You Test the Nearest Anchor?
Again, not automatically.
The nearest anchor may not be the correct additional sample.
Additional test locations should follow:
Approved sampling plan
Consultant instruction
Engineer requirement
Project failure procedure
Random testing can create more confusion.
When Additional Testing Can Be Useful
Additional testing may help determine whether the issue is:
Isolated
Related to one installer
Related to one installation zone
Related to one material batch
Related to poor concrete
Systematic
The additional testing programme should be structured.
One Failed Anchor Does Not Automatically Mean All Anchors Failed
A single failed test may represent a local problem.
However, it should not be ignored.
The project team may need to review:
Nearby installations
Installation records
Same-day work
Same batch
Same installer
The correct response depends on the project.
Repeated Failures Are More Significant
If several similar anchors fail in the same way, the project team should investigate more broadly.
Repeated problems may point to:
Installation procedure
Training
Hole cleaning
Curing
Material control
Test setup
Concrete condition
Patterns matter.
Should the Failed Anchor Be Removed?
This decision should follow the responsible engineer or approved project procedure.
Do not remove the anchor before documentation is complete if its condition may be important for investigation.
What Should Be Included in the Failure Report?
A failure report may include:
Project name
Anchor ID
Test location
Anchor type
Anchor size
Chemical anchor system
Required load
Maximum achieved load
Failure behaviour
Equipment details
Calibration information where required
Photographs
Installation information
Follow-up action
Example Failed Test Record
ItemExampleAnchor IDCA-L12-G4-02Anchor SizeM16Required Load80kNMaximum Load56.8kNObservationAnchor movement / pull-outResultFailFollow-UpEngineering review required
The actual report should follow the project’s requirements.
Why Tester Calibration May Matter After Unexpected Results
If a result is significantly different from expectations, the testing equipment should also be considered.
Where relevant, review:
Tester model
Serial number
Calibration status
Equipment condition
This helps rule out measurement issues.
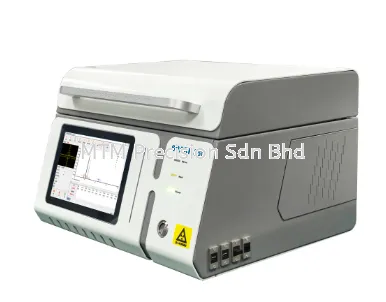
Langry APT200 for Professional Anchor Testing
For suitable applications, the Langry APT200 provides:
Measurement Range: 0–200kN
approximately:
20-ton class capacity
It can be used for professional chemical anchor and other suitable pull-out testing applications where the required force and test setup fall within its capability.
What Information Should Be Sent to MTM Precision?
For equipment selection or technical discussion, provide:
Anchor Type + Anchor Size + Required Test Load + Application + Site Photo
For failed-test investigations, it can also be useful to provide:
Maximum achieved load
Failure photo
Test setup photo
Chemical anchor product
Curing information
Frequently Asked Questions
What should I do first after a failed chemical anchor test?
Stop, make the area safe, record the maximum load, identify the anchor and document the failure.
Should I immediately retest the same anchor?
Not automatically. Follow the approved project failure and retesting procedure.
Does one failed anchor mean all anchors are bad?
No. One failure may be isolated, but it should be investigated properly.
Should nearby anchors be tested?
Possibly, depending on the project’s approved procedure and engineer’s instruction.
Can poor test setup cause a failed result?
Yes. Alignment, reaction setup, adapters and equipment condition should be reviewed.
Can incomplete curing cause failure?
Yes. Chemical anchors should be tested only after the applicable curing requirement is achieved.
Should the failed anchor be removed immediately?
Not necessarily. Complete documentation and follow the project’s engineering instructions.
Can Langry APT200 be used for chemical anchor testing?
It can be suitable for applications within its 200kN measurement range and compatible test configuration.
Where can I buy a Langry anchor pull-out tester in Malaysia?
Contact MTM Precision Sdn. Bhd. for Langry APT-series model selection and current quotation.
Chemical Anchor Pull-Out Testing Equipment Malaysia
MTM Precision supplies professional construction and civil engineering testing equipment for:
Main contractors
Structural contractors
Façade contractors
QA/QC teams
Inspection companies
Testing laboratories
For equipment selection, send:
Anchor Type + Anchor Size + Required Test Load + Application + Photo
This helps determine whether Langry APT100, APT200 or APT300 is appropriate for your testing requirement.
Contact MTM Precision
MTM Precision Sdn. Bhd.
Showroom & Service Centre
No. 29-1 & 29-2, Jalan Bandar 18,
Pusat Bandar Puchong,
47160 Puchong, Selangor, Malaysia
🌐 Website: www.mtmpre.com.my
📧 Email: mtmpre@yahoo.com
📱 WhatsApp: +6016-660 7346
For Langry Anchor Pull-Out Tester Malaysia, chemical anchor testing equipment, model selection and current quotation enquiries, contact MTM Precision.
12 Aug 2026


